How to get a FREE top level custom domain for your blog from blogger.com (Blog from google). These domains are from Freenom.com and you can get .ga .cf .tk .ml .gq domains for FREE! indefinitely!
Go to www.freenom.com for the domains.
====================================================================================================================== A Records (common A records) ====================================================================================================================== 216.239.32.21 216.239.34.21 216.239.36.21 216.239.38.21 ======================================================================================================================
Like it and share it if you found this helpful. If there's anything to be corrected please let me know in the comments. More how to videos will be done soon enough so stay tuned.
This article will provide a step-by-step guide on how to correctly apply a new xml Blogger template to your blog. This process can be tricky depending on several factors (quality of the code in the new template, your existing widgets, etc) so you need to be careful when changing your template. Don’t worry though, just follow these step-by-step instructions below and we’ll hopefully get you through it without much pain.
Steps
1
Sign in to your blogger blog and head to “design” => “Edit HTML”
2
Before uploading new template backup your previous template.
3
Now browse your computer and select and upload your desired template.
4
After this process, blogger will ask whether to keep or delete your widgets.Take your choice (see screenshot).
5
Now preview your blog and if everything is fine hit 'Save Template' button.
After you have included content in Artisteer and published your template to Blogger, you will need to publish all the pages from your template in order to have them displayed in your blog. For this please follow the steps below:
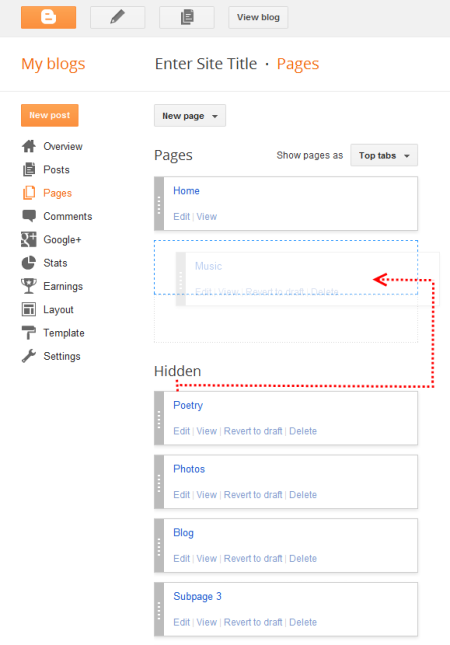
Go to My Blogs in Blogger and choose the blog.
Navigate Pages.
Drag and drop the neccessary pages from Hidden to Pages section like this:
You may need to move the default "Home" page from Pages to Hidden section.
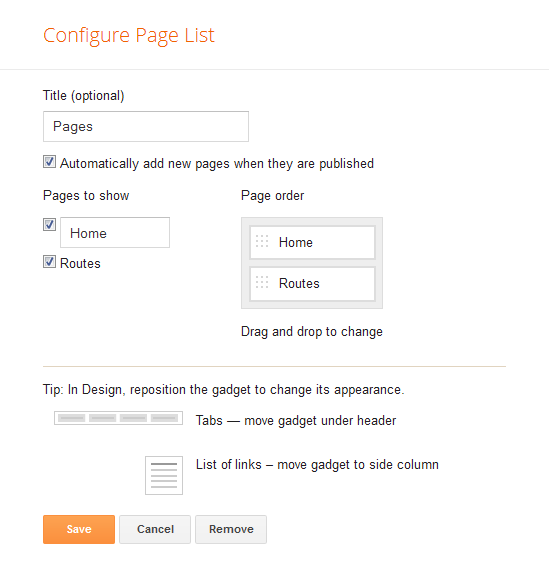
Go to Layout -> Pages and click Edit, you will see Configure Pages List.
Enable the pages that should be present in your horizontal menu (in the order you wish them to appear in the menu area) by checking the boxes next to them:
Uncheck the box for the default Home page.
Click "Save" and preview the blog. All the pages should be present as in Artisteer project.
HOSTING IMAGES
Blogger does not support uploading images directly to Blogspot accounts, so you will need to select one of methods available in Artisteer for hosting template's images externally. Artisteer provides three image hosting options which may be used depending on your reliability and performance requirements:
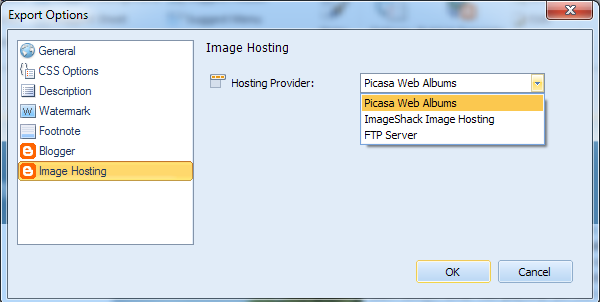
Picasa Web Albums This service is used by default and is suitable in most cases as Picasa utilizes the same Google account used for Blogger and does not require additional registration or configuration. To set the hosting options navigate please File -> Export -> Options -> Image Hosting.
NOTE: Picasa does not support large images being accessed from custom domains, therefore when hosting your blog on a custom domain (eg. www.<yourname>.com) Artisteer will instead upload larger images to free ImageShack image hosting service. This may occasionally result in slower performance, therefore custom domain owners may consider choosing other image hosting options listed below.
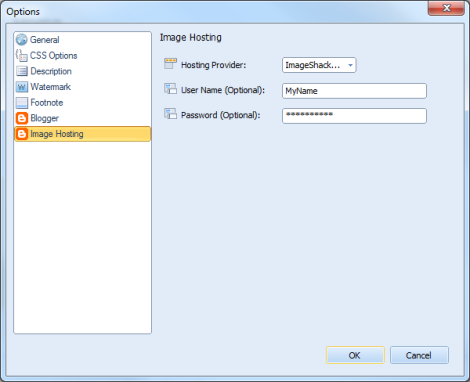
ImageShack ImageShack is an alternative to Picasa and offers a free service that does not require user registration for uploading the images. Nevertheless, you should be registered to use your hosted images. Artisteer supports both free service and paid ImageShack accounts. Enter your login information in Artisteer to use the ImageShack hosting.
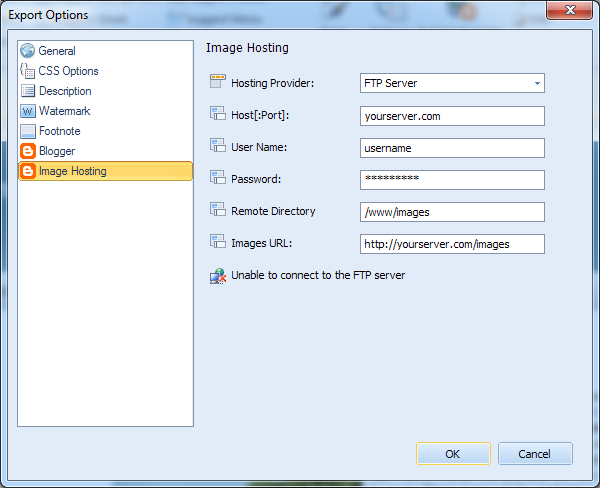
FTP You may choose to upload images to an FTP server by providing your FTP account information, FTP folder where you want images to be stored, and the URL that corresponds to the specified FTP folder.
You may also use any other service to host your images. In such case you select to export (rather than publish) your template in Blogger format and separately upload images to your hosting destination.
Please, keep in mind that neither ImageShack nor Picasa allow to publish .swf files. Using Flash Header will require some other hosting service for uploading images. For this select "FTP server" as a hosting service in Artisteer Export Options.
EXPORTING AND INSTALLING BLOGGER TEMPLATES
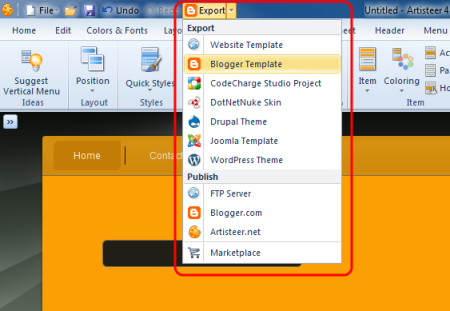
In some cases you may choose not to publish your Blogger template but export and manually upload it. To export a Blogger design:
Navigate Export -> Blogger Template.
In the Export dialog enter the folder name and the path to the exported template, check the appropriate boxes to export the template as ZIP archive and/or include the ARTX project.
Select the location for the exported images, configure the Menu Source and other options by clicking "Options".
Click the "Export" button.
To install a Blogger template:
Open the exported main.xml file and modify the image paths to reflect the location you’ve chosen to place the image files.
Log in to your Blogger Dashboard.
Navigate Template -> Edit HTML and paste the code from main.xml.
Confirm and Save.
CREATING HORIZONTAL MENU
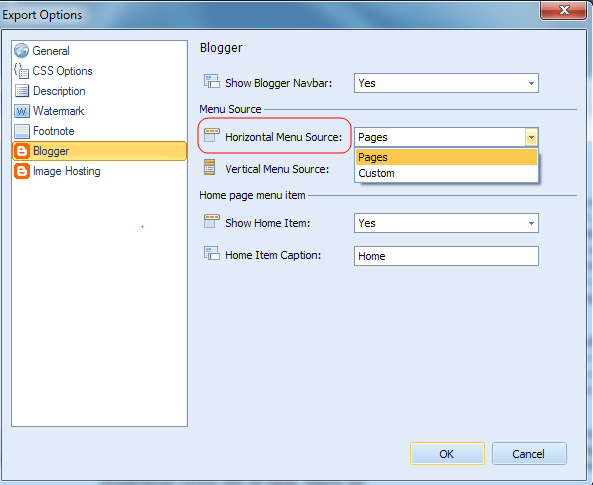
Before publishing/exporting the template open Artisteer Export Options (File -> Export -> Options -> Blogger) and specify the Horizontal Menu Source. The default horizontal menu source will be Pages, but you can also select "Custom" if you would like to use custom links.
To edit the menu in Blogger:
Log in to your Blogger Dashboard.
Go to Layout-> Pages -> Edit. This will take you to Configure Page List.
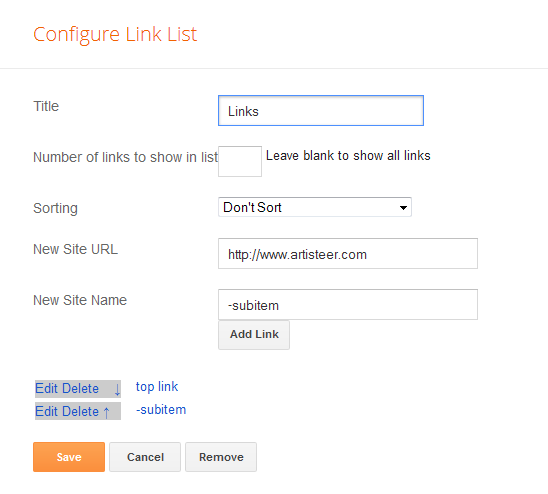
If you are creating a custom Top Menu instead of Pages you will see the Top Menu bar. Select Edit and add the menu item link in the Configure Links List.
Click "Add Link" to add links.
If you need a multi-level menu please enter "-" (dash) before the Subitem name, for example: "-Submenu Item". Please note that the Submenu item should be placed below the parent menu item.The page-source menus can have only one level of menu items.
Click Save.
Note:
If you do not want to use the menu please select a layout in Artisteer without a menu.
"Home" item is added when the "Show Home item" option in Artisteer Export Options dialog is set to Yes.
WORKING WITH VERTICAL MENU
In the Export Options you can select a Vertical Menu source - Archive, Pages or Custom Vertical Menu. Go please to File -> Export -> Options -> Blogger.
To edit the Vertical Menu:
Log in to your Blogger Dashboard and select "Layout".
Find the Vertical Menu area and select "Edit". The Vertical Menu area will be named "Pages", "Links" or "Archive" depending on the selected Vertical Menu Source.
Add menu item links in the Configure Links List.
If you need a multi-level menu please enter "-" (dash) before the Subitem name, for example: "-Submenu Item". Please, make sure to place the Submenu item below the parent menu item.
Note: The page-source menus can have only one level of menu items.
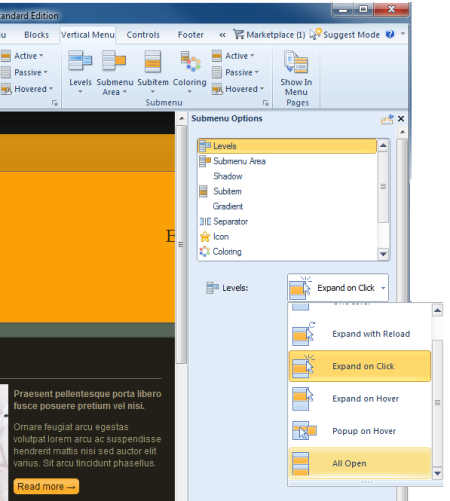
Subitems will show up on the website after clicking the parent item. To change this setting, please open your Artisteer project and navigate Vertical Menu -> Submenu -> Levels -> e.g. All Open. After that re-publish your template and repeat the steps described above.
Click Save.
DISPLAYING BLOGGER NAVBAR
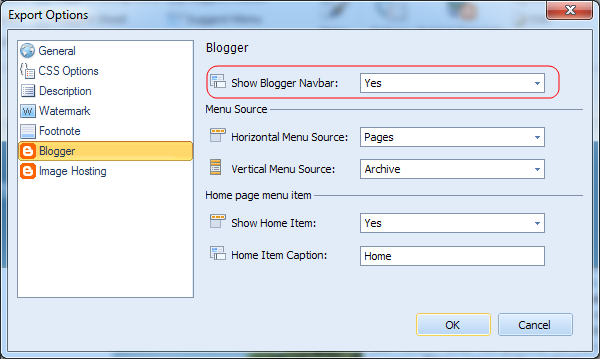
The "Show Blogger Navbar" option allows you to hide/show the Blogger navigation bar on the top of your pages. To set this option go please to File -> Export -> Options -> Blogger.
Make sure that you do not violate Blogger Terms of Service if you decide to remove the Navbar.
ADDING GADGETS TO HEADER
Artisteer 4.0 templates published or exported to Blogger support gadgets in Header. The style and position of gadgets can be adjusted with CSS code. Please follow the steps below:
Drag and drop a gadget above the Header area.
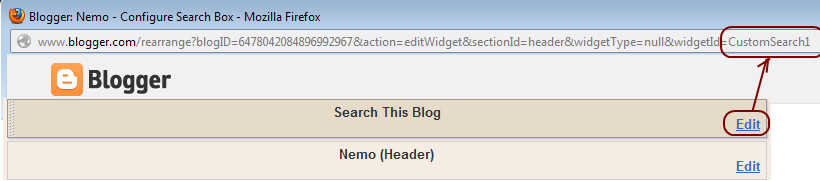
Click Edit Gadget and copy the gadget's id, e.g. CustomSearch1. The id is required to position a gadget with CSS.
Select Edit HTML and paste a custom CSS code after /* Begin Additional CSS Styles */ in the code window. Use CTRL+F for faster search:
After so many months of trying I finally got my new http://www.mrakesh.com.np/ domain got working. So, here I am to share how I did it so that you might not waste 6 more months just to do what could be done in a week or less.
Here are the procedures I have been through.
First of all you need to have a domain name. If you want a ".com" ".info" etc domain you need to purchase that domain. So, instead you can use ".com.np" domain which is free for Nepali Citizen or Organization of Nepal. You can get more information about domain registration at MOSwebsite.
This is what I did. Since my blog is purely for personal purpose I have to choose either my name (i.e. one that is in your citizenship) or in my case rakeshmanandhar.com.np was already taken so I have to choose either mrakesh.com.np or rakeshm.com.np (where 'm' stands for my sir name). So, I preferred "mrakesh.com.np".
Since we still need to host the blog at blogspot.com we only need domain hosting. (i.e. just redirect the blog to the new domain) So, for this we have to use some free domain hosting service for which I chosehttp://freedns.afraid.org/. Now open the link and register/sign up.
Then go to http://register.mos.com.np/form.asp and then fill up the form with your personal information and when you reach "Primary Name Server" fill the form as in the image shown.
And then write and application letter and drop it in their office located at Durbar Marg, Kathmandu or fax the letter with a photocopy of your citizenship.
Now, in 2 days your domain will be registered and you will be notified by email.
So, the first step is complete and now we still have to configure in freedns which you earlier signed up. Login to http://freedns.afraid.org/. Then click 'Domains' on left bar and click 'Add a domain' as in the following image.Then in domain field type the domain name you registered with earlier in Mercantile Office Systems; in my case "mrakesh.com.np"; then click submit.
Now, click 'Subdomains' on left bar and click on the added domain (i.e. in my case www.mrakesh.com.np)
After that select 'CNAME' as type and put 'www' in Subdomain and 'ghs.google.com' in Destination as in the following image.
Now you have to wait at least 48 hrs. to 2 days for your dns settings to work.
Now login to your blogger and then put your registered domain in blogger's settings in Publishing. Use full address i.e. in my case http://www.mrakesh.com.np/
That's all and you now have a new domain set up for blogger.
Why should you create blog in blogger.com, not in other free blog providers? Actually, there is no “should”, but blogger.com has more advantages than other providers do. One of the advantages is the easiness in operating so that blogger.com is good for the beginners. Other advantages are the freedom in editing and replacing the templates to make the best display, custom domain which means that you can replace the domain with your own but with the blogspot hosting, e.g. yourname.blogspot.com can be changed into yourname.com, but still in the same hosting, i.e. the free blogspot hosting.
After registration page open, go to the right bottom of the page where you can change the language to your own to make you easier to understand the instructions, but in this tutorial, I use English for more global targeting. Please login by using your username and password of your gmail (your email account is allowed to use for login to blogger).
Click "CREATE A BLOG" button
Enter your Blog Title in the field next to "Blog Title", and your expected blog address in the field next to “Blog address (URL). Need to remember that when you enter your expected blog address, you have to be sure of it as you cannot replace it in the future, except you use Custom Domain facility. Check for the availability. If your expected blog address is not available, replace with your new one and so on until you get it. Then type the character you see next to "Word verification", below blog address point and click CONTINUE for the next steps.
Choose a starter template, meaning that you can replace this template in the future and then click CONTINUE.
You will see "Your Blog has been created!" meaning that now you have a blog and you are ready to start Blogging, by clicking "START BLOGGING".
You will soon be in the post editor, where you can write anything as you may have thought about before. (it is recommended to directly write for your first post to avoid "Blogger Anti-Spam Robot" that can result in your blog locked. For instance, you can write a very short entry if you have not prepared an entry: "Hello World!", and anything else you want. Click "PREVIEW" button to view how your post will be displayed, then click "PUBLISH POST" if you want your entry to be published.
Click "View Post" to see your blog. Below is the example of the blog display created